Saturday, 27 October 2012

Week 6 - Ghost Meringues

Oh what a long and painful week it has been. I have had a horrible pain in my neck all week and finally found out the cause, a torn muscle. All these years I thought it was a migraine in the back of my head, but it turns out it was a muscles slowly tearing in my neck, and apparently it finally let go. Luckily my doctor gave me some great painkillers and I can finally get a couple comfortable hours a day out of it.

This weekend was perfect! Mr. VIP and I had a nice Friday date night, we went out for dinner and to a movie, it was a great end to my long week. Saturday we enjoyed another hike and more trips to the pet store, I’ll have to get new pictures of the tank to show everyone. VIP has been very sweet and protective of me this weekend, since we found out about my neck. I thought I could just go on with it, but even sitting in the movie theatre bothered my neck, as well as shoulder checking while driving and hitting any potholes. He has been so sweet though with the neck rubs and always making sure I’m comfortable J. Couldn’t ask for a better man.

So instead of doing my baking a little earlier in the week, I waited until I was good on my pain meds. However this weeks recipe is wonderful!! When I had them ready to go into the oven they were so adorable!! I decided since we are so close to Halloween, to do a couple spooky recipes. This is how we ended up with Ghost Meringues! They are so cute, and a great treat for adults and kids alike.

 
Crisp Chewy Meringues

Oven: 225F   Makes: 12 – 15 Ghosts

4 egg whites
pinch salt
1 teaspoon vanilla (or orange flower water, or maple extract)
1/8 teaspoon cream of tartar
2/3 cup sugar
2/3 cup icing sugar
1 tablespoon cornstarch
Mini Chocolate Chips

Whip the whites and salt into peaks, add the vanilla, and continue beating to stiff peaks. Stir the cream of tartar into the regular sugar and whisk into the whites very gradually, a spoonful at a time, until the meringue is stiff and the sugar has dissolved. Sift together the icing sugar and cornstarch. Sift over the meringue and gently fold until fully incorporated.

Pipe the meringues onto a parchment-lined baking sheet, almost like you are filling an ice cream cone. Place 2 mini chocolate chips for the eyes. Bake at 225ºF/110ºC until cream-coloured and crisp on top when tapped, 1 to 1-1/2 hours. Remove from the oven. Cool on the trays. Store in an air-tight container.
 
 
Tips:
If you can pipe in one smooth move, it is less likely your meringue will crack between the sections. These are on the sweeter side, because you take them out before they go brown and hard, so they are soft in the middle but hard on the outside. You may want to cut back on sugar when doubling the recipe.


These turned out great! They were so adorable and very good. As mentioned they are on the sweeter side, so I will probably adjust the sugar next time to fix that. Other then that, they were perfect. They would work for any Halloween party, adult or child.
 
 
Another week down :). Hope everyone is enjoying the fall season, make sure to get out and walk through the leaves, it's just like being a kid again.
 
 
Happy Baking!!!
 
Sey


Week 5 - Cheesecake Truffles

Ah! I know, I’m super super late with this post but I do have kinda a good reason. My plan was to make pumpkin macaroons. This would have been my last “Thanksgiving” recipe…..but they didn’t work. I then did a whole lot of research to figure out where I went wrong, and I found it! Or so I thought. I tried making the shells again….and they didn’t work…again. So I got super frustrated and gave up on Wednesday (my final attempt). So that’s when I figured I would take one of my other new recipes and give it a try :D.

So my weekend (13th & 14th) was wonderful. Mr. VIP and I went for a nice walk in Gatineau Hills, the leaves are gorgeous right now and the weather was perfect. We couldn’t believe how busy it was, to the point where the parking lots were full. We then went and did some shopping for him and for his Salt Water tank, and then went and saw a movie. I also bought my outfit for Casino Night in a few weekends, for those who haven’t read my 30 Day posts, it’s a yearly outing my best guy friends and I do. It’s a great night with friends, where we dress up and just enjoy each others company. All in all it was a wonderful weekend with Mr. VIP, and just what I needed since I wasn’t feeling 100%.

Since my macaroons didn’t work, I went on to something I knew I could do. Cheesecake truffles. It takes a bit of time, but they are pretty simple to and taste amazing. I like these types of recipes, because you can add your own little flare and colours. Instead of truffle balls, you can cut out shapes or put them onto sticks to make pops.


Cheesecake Truffles

Oven: 325F    Makes: 40 – 50 truffles


5 8-oz. packages cream cheese at room temperature
2 cups sugar
¼ cup all-purpose flour
¼ teaspoon salt
5 large eggs
2 egg yolks
2 teaspoons pure vanilla extract
¼ cup heavy cream

 
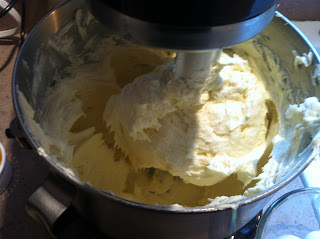
In a large bowl, beat together the cream cheese, sugar, flour, and salt, on low speed, until smooth. Beat in the vanilla and cream.

Grease a 10-inch cake pan (not a springform pan), and pour the batter into the cake pan. You can also use smaller pans as well, adjust baking time accordingly. Bake until the cheesecake is firm and slightly golden on top, 45 to 60 minutes.

Remove the cheesecake from the oven and cool to room temperature. Cover and refrigerate until cold, a few hours or overnight.

When cheesecake is cold and firm, scoop the cheesecake into 2-ounce balls and place on a parchment paper-lined baking sheet. Freeze the cheesecake balls, uncovered, until very hard, 1 - 2 hours.

When cheesecake balls are frozen and ready for dipping, prepare the chocolate in a double boiler, set over simmering water, or in a heatproof bowl set over a pot of simmering water, heat ½ pound of chocolate with a tablespoon of shortening, stirring often, until chocolate is melted and chocolate and shortening are combined. Stir until completely smooth. Do not heat the chocolate too much or it will loose its shine. Have another ½ pound of chocolate ready to heat for remaining truffles.

Alternately, you can microwave the same amount of chocolate coating pieces on high at 30 second intervals, stirring until smooth.

Quickly dip a frozen cheesecake ball in the melted chocolate, rolling until completely coated, tapping off the excess, and placing on a piece of parchment paper. This would also be the time to sprinkle on any decorations you would like. Once hard, you can also drizzle on another type or color of chocolate.

Place dipped truffles in fridge until set. Truffles can then be placed in an airtight container and placed in the freezer or fridge.


Tip:
In all honesty you can use your own cheesecake recipe, bake it with no crust, as long as it is a dense cake when baked. Next time I am going to use my ricotta cheesecake :) Can't wait!


Don't judge my ball making skills!!!


These were an insane hit at work, people would take one and eat it on the way back to their desk. Before they got there they would be heading back for another.

So that's it for week 5, finally got it up :). I have learnt so much from my macaroon mistakes though, that it was alllll worth it.


Happy Baking!!

Sey

Monday, 8 October 2012

Week 4 - Pumpkin Pie

Happy Thanksgiving!!!! What a wonderful meal I had with family last night, way too much food with lots of laughs. My parents went away for the weekend, which meant puppy sitting for me J. He was a great dog to take care of, and is good company at night. Oh and for babysitting they picked me up some cute Halloween baking items, which I can’t wait to use for the cupcakes I’ll be making.

So my parents left early Saturday morning to head across the boarder for some much need R&R. Puppy and I went to bed for a bit longer, and then the baking bug bit me. I was up and making pumpkin pie before you could blink. It was my first time trying it, but it actually tastes really good. The one thing I always liked about my mother recipe is it’s not sweet, it tastes of pumpkin and the spices. I find a lot of store bought pies are far too sweet to buy anymore.

Anyone who wants to try fresh pumpkin, it’s very simple. It is exactly like roasting squash. Make sure it’s a smaller baking/pie pumpkin, the large jack-o-lantern ones don’t have the strong flavours.

  • Set over to 375F
  • Wash the outside of your pumpkin.
  • Cut the stem and woody bottom part off your pumpkin, and cut it in half from top to bottom, or smaller pieces to cook faster
  • Scoop out all the insides and seeds
  • Place skin side up in a deep dish
  • Add a ¼ inch of water to the baking dish
  • Cover with foil
  • Bake for 1 hour to 1½ hours till pumpkin is tender.
  • Let pieces cool
  • Scoop out all the insides and throw away the skin.
  • Puree the pumpkin (or mash) until smooth
  • I like to strain mine using cheese cloth and a strainer to remove some of the liquid
  • Use right away or store in your fridge for a few days

You can also cut off the skin and boil small pumpkin pieces until tender, or do the same as above and microwave the pumpkin pieces until tender. However you prefer.


Never Fail Pie Crust

Makes: 5 one shell 9” pie crusts

5 cups of flour
1 tbsp brown sugar
1 tsp salt
½ tsp baking powder
2 cups of lard/butter/margarine
¾ cups cold water
1 egg
2 tsp vinegar

Mix together flour, brown sugar, salt, and baking powder in medium to large mixing bowl. Stir well until blended.

Cut in ½ the lard and mix until mixture resembles course meal, then add remaining lard and mix until mixture is the size of peas.

Combine water, vinegar, and egg in a small bowl. Beat slightly. Add liquid ingredients all at once to the flour mixture, blend until dough comes together.

Divide into 5 equal balls of dough, can be wrapped well and put into freezer. 

If using right away, let dough sit in fridge for about 45 minutes.


Tips:

If you want a nice thin crust for your pie (which I prefer for pumpkin pie) divide the dough into 5, as in the recipe. If you like a thicker crust, don't divide into more than 4. I cut out little circles and overlapped them on the rim, I wet the dough on the rim before putting the circles on. This just gives a nice finishing touch to the pie.


Pumpkin Pie Filling

Oven: 425F & 350F   Makes: 2 Pies (8 pieces each)

4 eggs
800 ml of Pure Pumpkin (or 1 large can of pumpkin)
2 cups of brown sugar
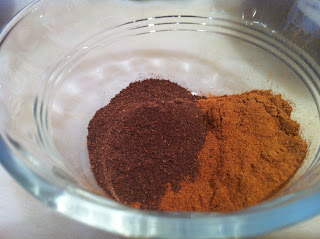
2 tsp of ground cinnamon
1 tsp of ground nutmeg
½ tsp of ground ginger
½ tsp of salt
  cups of evaporated milk
2 unbaked pie shells

Beat eggs lightly in medium bowl. Add pumpkin, sugar, cinnamon, nutmeg, ginger and salt; stir until well combined. Blend in milk.

Pour filling into pie shells. Bake at 425F for 15 minutes. Reduce heat to 350F and continue baking for 30 to 35 minutes or longer, or until the centre on the pie is set. Cool.


 Tips:
 
The filling barely rises, so fill your pie shell to as full as you want. To keep the edges from getting too crispy or burnt, I wrap them in foil and remove it when there is about 15 minutes left of baking.


I love Thanksgiving, the amazing turkey dinner and pumpkin pie always makes my day. I have one more pumpkin recipe for next week and then it will be on to Halloween treats :). We have some new people starting at work tomorrow, so I will be able to bring my next recipe in as a welcome to everyone, I hope it turns out well since it will be a brand new recipe for my book.

Well I hope everyone enjoyed their Thanksgiving weekend and got super full on turkey and pie. I'll see you in a week.


Happy Baking!

Sey