Sunday, 25 March 2012

Day 16 - Brand new recipe

Oh how I wish my little lizard had a sense of how important sleeping in on the weekend is. I was up at 8am this morning because my lil Rico was awake and wanted to eat. So after giving him a few worms and chopping up lettuce for him, I thought I could climb back into bed and sleep for another few hours. Was I ever wrong. After laying in bed for 5 minutes I hear commotion in his tank, when I open my eyes here Rico is crawling up the front of his tank trying to get my attention. So now while I am sitting here typing this up, he is running all over the bed trying to find another way to get into trouble. He is lucky he is cute.


Ok so I have to admit that this challenge is very difficult for me. When I am going to serve a new recipe, I try making it before hand so I can work out any kinks, this may take 3 or 4 trys. So for me to be posting my first try for everyone to see makes me cringe. I also didn't choose a simple technique to try, so it was 50-50 that it would work out perfectly. When I try a new recipe I make sure I have plenty of time to do every step as described. Also, like I'm going to show, it doesn't always work out the first time around. It may take a few tries, but everyone can learn the most difficult of recipes. So here is my first attempt at Brandy Snaps.


Brandy Snaps

Oven: 350F

1/3 cup unsalted butter
2 tablespoons golden syrup
1/3 cup soft brown sugar
¼ cup flour
1 ½ teaspoons ground ginger
60 g dark chocolate

Preheat oven to 350F. Line 2 baking sheets with baking paper.

Place the butter, syrup and sugar in a small sauce pan and stir over low heat until the butter has melted and the sugar has dissolved. Remove from the heat and add the flour and ground ginger to the saucepan. Use a wooden spoon to stir the mixture until the ingredients are well combined, taking care not to over beat.

Using 2 to 3 teaspoons of the mixture for each brandy snap, drop the mixture onto the tray about 12 cm (5 inches) apart. Bake for 5-6 minutes, or until lightly browned. Leave on tray for 30 to 45 seconds then, while still hot, lift one biscuit off the tray, using a large flat knife or spatula , and wrap around the handle of a thin wooden spoon and set aside to cool while you curl the remaining brandy snaps. Repeat to use all mixture.

Put the chopped chocolate in a heatproof bowl. Bring a saucepan of water to a boil, remove from the heat and place the bowl over the water, making sure the base of the bowl doesn’t sit in the water. Stir occasionally until the chocolate has melted.

Dip both ends of each brandy snap in the melted chocolate and leave to dry on a foil-lined tray.

Tips (This one is from my cook book):
There is a real art to working with these biscuits: work quickly, as they harden and crack when cooled. If they cool too much, return them to the oven for a few minutes to warm, then try again.


Melt the butter, syrup and sugar together on low heat.


Mix the remaining ingredients into the sugar mixture.


It will look like a thick caramel sauce.


Drop the mixture onto the covered baking sheets.


The snaps will bake into a spider web effect.


This was my only perfect one. Wrap the snaps around a round handle while still warm.


Well it was a good first effort.


Tips:
Test the snaps before lifting them, if they are to hot they liquefy when you pick them up. So they have to be just right.


I bought these shoes for my annual casino night. I love them, I need another night out to wear these again. Hint hint :D.


So I will be trying this recipe again, and hopefully it will be better than this one. I will give an update when I try it again.Well that is all for now, I have to try and find Rico and get him back in his tank.


Happy Baking!

Sey


Saturday, 24 March 2012

Day 15- Un-healthy

Day 15 and 300 hits from 7 different countries!!!! This has been an amazing experience so far, and although the past few days have been hard I don`t regret starting this challenge. So I was a busy little beaver today catching up on my baking, and of course for my last recipe I choose something a little harder. So after picking up my ingredients and going to breakfast with my mom, I got to spend a little time with my nephew before throwing myself into the kitchen and making 3 brand new recipes. Oh and if your just joining me, go back a couple posts, as I did 2 new posts before this one.


So when I was a kid, I think the most un-healthy thing I ate was sticky buns. They were crispy on the outside, soft on the inside, warm and had the sugary glaze on top. Now that I am older, my stomach shows me that the sugar desserts don`t work all the time. So I chose sticky buns, but the result was actually a very good bun that's not sugar-rush sweet, its still warm and soft, but your teeth don`t hurt eating it.


Cinnamon Rolls

4¾ to 5¼ cups flour
1 package active dry yeast
1 cup milk
1/3 cup butter
1/3 cup granulated sugar
½ teaspoon salt
3 eggs
¾ cup packed brown sugar
¼ cup flour
1 tablespoon cinnamon
1/3 cup butter
½ cup golden raisins (optional)
½ cup chopped pecans (optional)
1 tablespoon half and half or light cream
1 recipe Vanilla Glaze


In a large mixing bowl combine 2 ¼ cups of the flour and the yeast. In a saucepan heat and stir milk, 1/3 cup butter, granulated sugar, and salt just until warm (120 F to 130 F) and butter almost melts; add to flour mixture along with eggs. Beat with electric mixer on low for 30 seconds scraping bowl. Beat on high speed for 3 minutes. Stir in as much of the remaining flour as you can.

Turn dough onto lightly floured surface. Knead in enough of the remaining flour to make moderately soft dough that is smooth and elastic (3 to 5 minutes total). Shape dough into ball. Place in a greased bowl; turn once. Cover; let rise in a warm place until doubled (1 hour).

Punch dough down. Turn out onto a lightly floured surface. Divide in half. Cover and let rest for 10 minutes. Meanwhile, lightly grease 2 9x1½-inch round or square baking pans or 2 baking sheets; set aside. For filling, stir together brown sugar, the ¼ cup flour, and cinnamon; cut in 1/3 cup butter until the mixture resembles coarse crumbs.

Roll each half of dough into 12x8-inch rectangle. Sprinkle filling over dough rectangles. If desired, sprinkle with raisins and/or pecans. Roll up each rectangle starting from a long side. Seal seams. Slice each roll into 12 pieces. Place cut sides down in prepared pans or baking sheets.

Cover; let rise in warm place till doubled (about 30 minutes).

Brush dough with half and half. Bake in 375F oven for 20 to 25 minutes or until light brown. If necessary cover with foil for last 5 to 10 minutes to avoid over browning. Remove from oven. Brush again with half and half. Cool for 1 minute. Carefully invert rolls onto a wire rack. Cool slightly. Invert again onto a serving platter. Drizzle with Vanilla Glaze. Serve warm.


Vanilla Glaze

In a small bowl stir together 1 ¼ cups of icing sugar, 1 teaspoon light corn syrup, and ½ teaspoon vanilla. Add enough half and half or light cream (few tablespoons) to reach drizzle consistency


Tips:
This dough is very sticky, so wash you hands and use them to mix. It will make it a lot easier than using an electric mixer.


Combine yeast and dough.


Pour warm milk mixture over flour and yeast.


Form dough in to ball and place in greased bowl.


Roll dough half's in to 12x8-inch rectangles.


Sprinkle cinnamon and raisins/pecans over dough.


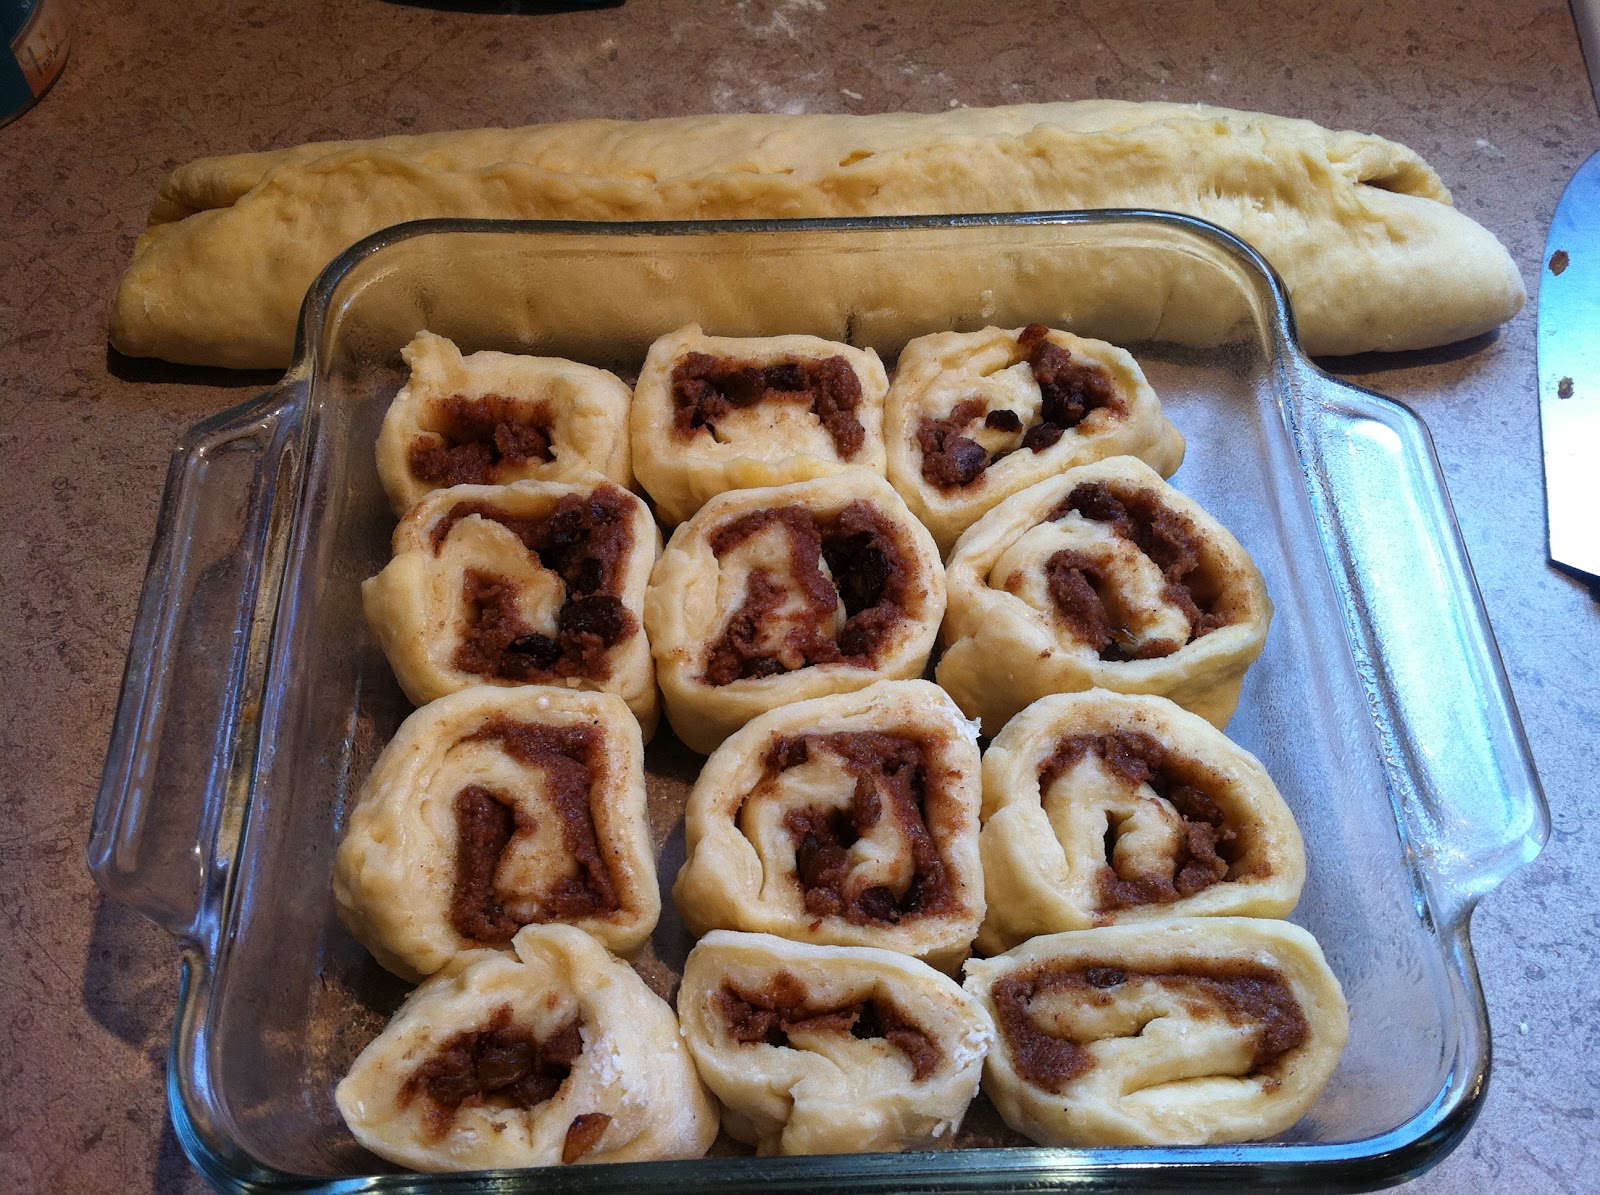
Roll dough and cut into 12 slices, lay in pan. To help seal dough seam wet finger tips and pinch dough.


Brush with half and half when they come out of the oven.


Glaze should be thin enough to drizzle, but thick enough to hold it`s forms.


Nothing is better than a warm sticky bun.


Tips:
Again, use your hands to mix when adding as much flour as possible. The dough is sticky and will climb your electric mixer. You can also use the 200F to help the dough rise like I used with white bread. Anytime you need yeast to rise set your oven at 200F, cover dough, place in oven, and turn the oven off. This creates the perfect warm spot to help the yeast rise.


These shoes are from my grade 8 graduation. I don`t have any marks on theses shoes. They go with my gorgeous gown that I need to find a reason to wear again.


I did it! I`m all caught up on my challenges. I am so happy. Today showed me that I really need to keep on top of this, especially if I want to make a career out of this. it will only get harder, and I won`t be able to take a day here and there just cause my life gets busy. Yet with all the hard work, I still love being in the kitchen and baking. With all the baking I did today, it was never un-enjoyable. I loved every second of it.


Happy Baking!

Sey
.


Day 14 - Healthy

So on to my Friday. I had a nice short day at work, so I could go shopping for my nephews birthday gift with Mr. VIP (he was originally going by one of my D`s but this name makes it easier). So I left work after a busy few hours, and got to go out in to the gorgeous sun, change out of my work clothes for jean shorts and flip flops, and go shopping with a guy who actually wants to be in a mall. What more could a girl want :P. So after we played with all the toys in the store, we found a great gift for baby. I also found an awesome Cadillac car that I want for my kids.

The worst word in the world...healthy. No one ever thinks of good food when they hear healthy. So I wanted to change that up a bit. With the gorgeous weather coming and time being spent in backyards, nothing is better than cold snacks. I have to give this one up for Mr. VIP, he always asks me what I am going to make and when I said I don`t know, he mentioned ice cream. That got my mind going. So I came up with Granita. It is basically frozen fruit juice. There is very little sugar, no dairy, and is very simple to make. This will also be a big hit with kids... big and small ;P.

Now this was originally Grapefruit and raspberries. There is someone in my house who can`t have grapefruit and I did not have juice, so I used what I had. This just shows how versatile this recipe is. Use the flavours and combinations you like.


Cranberry and Raspberry Granita

Makes 6 servings

2 cups cranberry juice (low calorie or sugar free)
1½ cups fresh or frozen raspberries (drained and thawed)
½ cup superfine sugar

In a medium bowl, combine the cranberry juice and raspberries; stir to mix well. Set a fine mesh sieve or strainer over a 1 quart freezer-safe container with a tight-fitting lid. Pour the raspberry mixture through the sieve; press the raspberries to extract as much juice as possible; discard seeds.

Add the sugar to the raspberry mixture; stir to mix well. Freeze, covered, stirring with a fork every 30 minutes after 4 hours, until frozen, about 6 hours total.


Mix the berries and juice together.


After sending the fruit through the sieve, only the seeds should be left.


It will be nice dark colour before going in the freezer.


The first stir will create small chunks throughout the juice.


The last few stirs will turn it into a thick slushy consistency.


I love serving this in wine glasses, it makes it look beautiful. You can always add a little something special for adults ;P


Tips:
The sugar is adjustable, test the flavours when you go to stir it the first time. If it is too sour, add a little more sugar. If it is a little sweet, add a little more juice or water.


So since this is my favourite recipe I have ever made, why not put my favourite shoes. I keep these shoes perfect, because I would cry if I ever had to get rid of them. They are just so unique and beautiful.


This was my first time making this recipe, it was a big hit. It is so refreshing and tastes just perfect. It will be great on the hot summer days, while relaxing outside. Thanks for the idea Mr. VIP.


Happy Baking!

Sey
Day 13 - Fruit

I'm back!! I'm sorry for disappearing again, life caught up to me. I thought it would be only one day, but than a migraine knocked me out for another day.

So I have been making a list of everything I need to do. I am off work as of 3pm March 27, and I want to do a major cleaning of my house, car and Ricos tank. So I have my list, and will be slowly checking things off as I get them done, all while increasing my daily walk time. So I will keep everyone updated on how I do with this  I may need some motivation so I am counting on everyone to help me out.

So today is fruit, it took me forever to decide what one thing I wanted to do with fruit. So I went out and found a new recipe. It is a mixed berry cake. It is a nice light cake, not sweet even though it has a syrup drizzle, and looks gorgeous.


Mixed berry cake with vanilla bean syrup

Oven 350F

½ cup butter, softened
1 cup caster sugar
3 eggs
¾ cup plain flour
½ almond meal
1/3 cup sour cream
1½ cups frozen mixed berries
½ cup drained canned seeded black cherries

Preheat oven to 350F. Grease a bundt pan well.

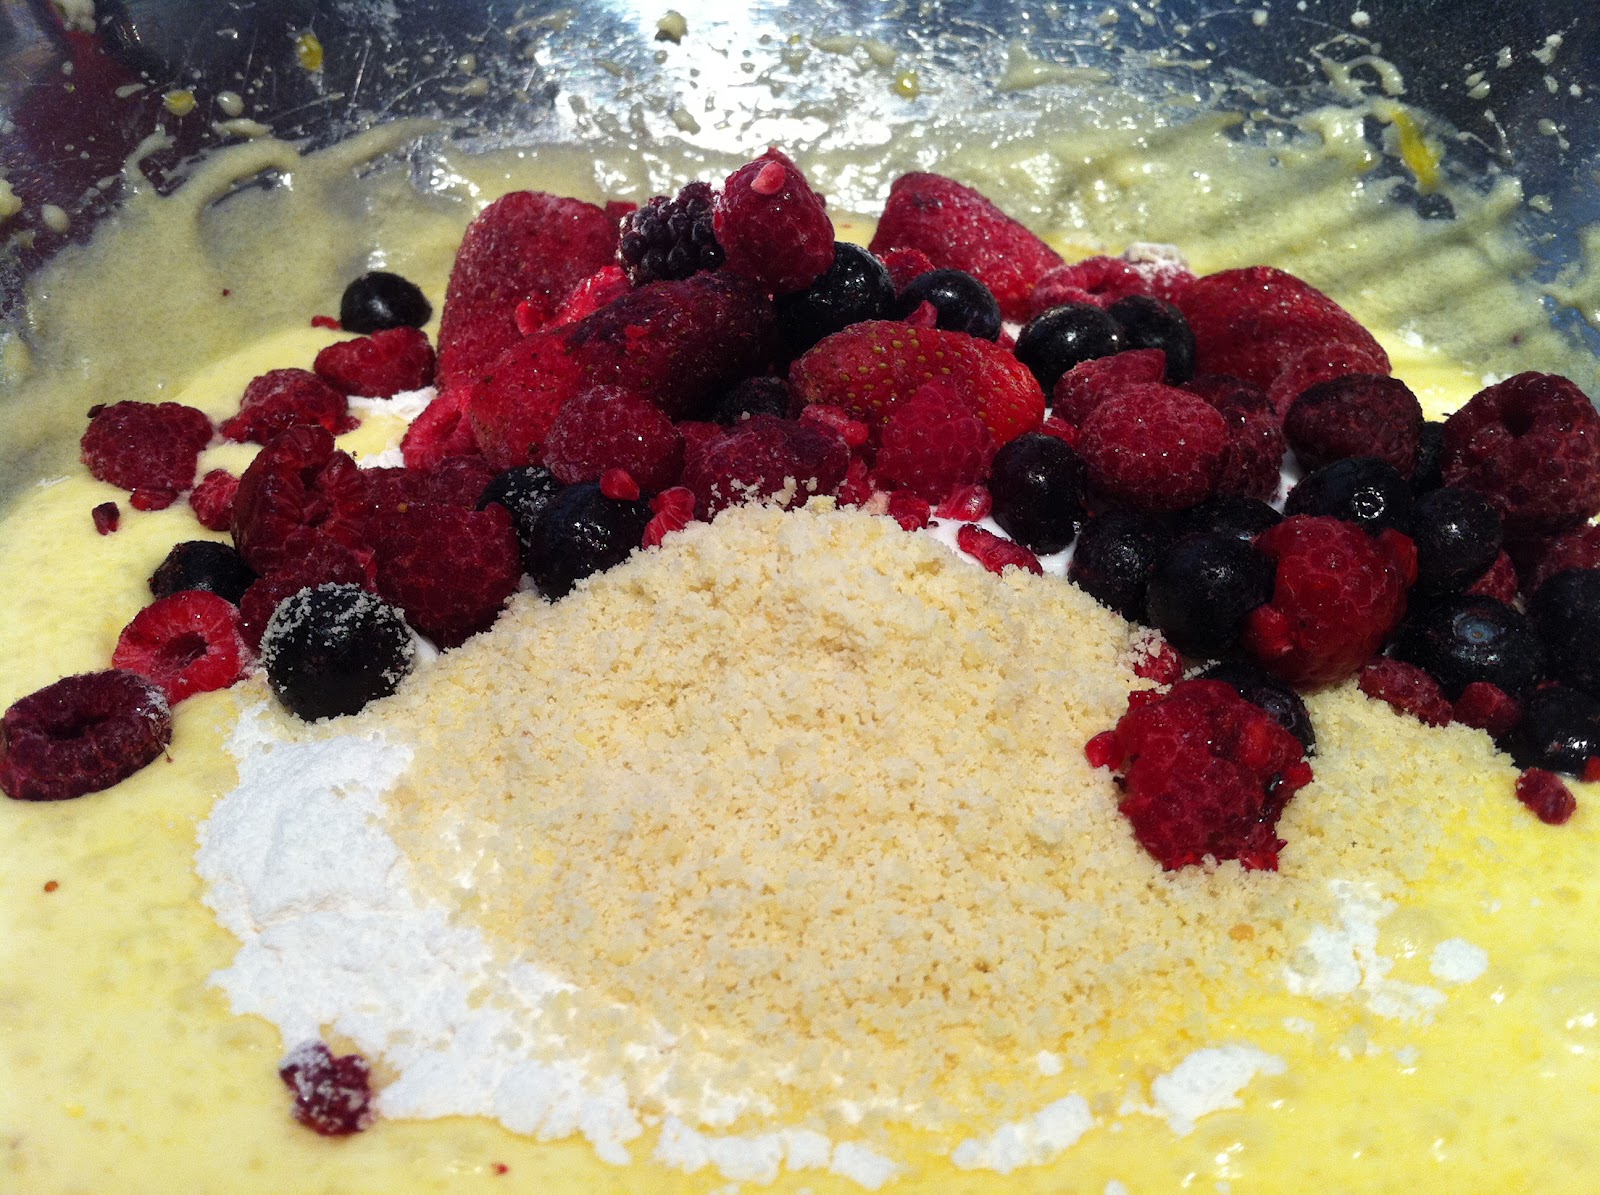
Beat butter and sugar in small bowl with electric mixer until light and fluffy. Beat in eggs, one at a time. Transfer mixture to large bowl; stir in sifted flour, almond meal, sour cream, berries and cherries. Pour mixture into pan.

Bake cake about 40 minutes. Let stand in pan for 5 minutes; turn onto wire rack.

Make vanilla bean syrup; pour hot syrup over cake.


Vanilla bean syrup

Place the water and sugar in small saucepan. Split beans in half length ways; scrape seeds into pan then add pods. Stir over heat, with out boiling, until sugar dissolves. Simmer, uncovered, without stirring, 5 minutes. Discard pods.


Tips:
Caster sugar is fine sugar, not icing sugar. This sugar melts easier than regular granulated sugar. You can use regular sugar, or put it in a coffee grinder. I use my magic bullet. If you don't have vanilla beans, you and use 1 teaspoon for each vanilla bean.


Mix the sugar and butter till fluffy


Beat in the eggs one at a time


I prefer to put the berries in frozen so that the juices don`t change the colour of the cake


The cake does not rise very much, so short bundt pans are usable


I finally got to use my vanilla beans for cooking! I have been using them for home made vanilla extract so far. 1 teaspoon of vanilla extract = 1 vanilla bean


The seeds from inside the vanilla bean.


Simmer the water, sugar and vanilla together to create a syrup


The recipe makes a lot of syrup, you only need to drizzle a few tablespoons on. However, use as much as you wish.


Tips:
I put mine on a cake tier, however it would be best to put it on something that could go in the fridge until serving. This will help firm up the cake.


So these are not my favourite shoes. The first day I wore them, my toes were killing me, but I got so many compliments that I can`t stop wearing them.


Yay I got one of my posts finished, now on to the next one. Thank you all for sticking by me, and for the messages to hurry up. I will try not to let this happen again.


Happy Baking!

Sey

Wednesday, 21 March 2012

Day 12 - Shot glass desserts

So I found the best work out....my nephew. I decided I would walk and pick him up from the babysitters today rather than someone driving over to get him. I knew he would love the walk, and this would change up my daily walk and make it a little more exciting. So after getting him here and sitting outside for a bit, I fed him and my mom took him from there. After dinner I took him out of his seat and began to clean his puffs off of him, to make it a little more fun I was throwing him in the air to shake them off. Bad idea. He loved it, the squeals and laughs coming out of him were hilarious. When I stopped he would bounce in my arms till I started again. I was sure my arms were gonna fall off afterwards. But I think it was the best workout I ever had.

Well today is shot glass desserts, I am happy I finally have a complicated recipe to show people. I love little desserts like this, because when people come over for dinner I can throw a bunch of different things in the middle and let people decide on what they want. You can make so many different desserts with the new little glasses they have out for dinner parties. I decided to make 2 different ones, a super easy and a medium difficulty, to give people ideas of what they can do. I have done chocolate mousse shooters, and jello martinis. Now you can also do no-cook cheese cakes, fruit salads, ice cream, etc. Just look up shot glass desserts and you will find all different recipes.

So I will do the jello martinis first, as they are very simple. Now my directions are based on my little glass, alter as you wish.


Jello Martinis

Rim the outside of the glass using lemon juice and sugar. Place a cocktail cherry at the bottom of each glass (the cherries with the long stem, can be bought at any bulk food store). Mix jello as per directions on the box without letting it set. Use a small gravy ladle or spoon to fill the prepared glasses with liquid jello. Let set in fridge.

An easy way to rim just the outside of a glass is to use a tissue or paper towel wet with lemon juice. Go around just the outside of the top of the glass.


If you use a lighter colour jello, such as blue or green, you will see the cherry just like a real martini.


Let the jello set in the fridge.


Tips:
The reason for only rimming the outside is because the jello may soak into any sugar it touches, and may ruin the rimming. This idea can be modified anyway you wish, put in bigger glasses, lemon twist, different fruit at the bottom or on the side of glass. You can layer different colour jellos by letting them set in between layers, or even add alcohol for an adult party.


Now on to the Chocolate Mousse shooters. This recipe is Julia Child`s, she is my inspiration. I have tried a few of her recipes and they are always amazing, she could make anything she wanted, from baking to meals.


Julia Child's Chocolate Mousse
From The Way to Cook by Julia Child"

1 cup semisweet baking chocolate
4 tablespoons strong coffee
6 ounces soft unsalted butter ( 1 1/2 sticks)
4 egg yolks
¼ cup rum or ¼ cup strong coffee
4 egg whites ¾ cup instant superfine sugar
2 tablespoons instant superfine sugar
whipped cream (optional)

Place the chocolate and 4 Tbsp strong coffee in a small sauce pan and place in a pan of hot water. Stir for a minute or so until melting begins. You will add butter before adding to other mixture.

Place egg yolks in a bowl and beat, adding the sugar in a thin stream. Continue beating until the mixture is thick, pale and forms a ribbon. Beat in the rum. Set over a pan of almost simmering water and beat for an additional 5 minutes. Test with your finger to make sure the mixture is warmed through. Allow to cool. It should again form a ribbon and have the consistency of thick creamy mayonnaise.

Stir the chocolate until smooth and gradually add the softened butter. When totally in corporate stir the mixture into the yolks and sugar.

In a clean dry bowl beat the room temperature egg whites. Begin slowly and increase the speed until soft peaks are formed. Sprinkle with 2 TBSP of sugar and a pinch of salt. Continue beating until stiff peaks are formed.

Fold 1/4 of the stiff egg whites into the chocolate mixture to lighten it. Scoop the remaining egg whites on top and delicately fold them inches.

Place into a mold or serving dishes and chill for several hours or overnight.


Select you favourite fruit to set at the bottom if desired.


Set the berries at the bottom of the shot glasses.


Melt the chocolate and 4 tablespoons of coffee together.


Beat the yolks and sugar until ribbons are created, long streams flow of the whisk


Beat in coffee over simmering water


Egg whites should hold their form when ready


Do not use an electric beater when mixing in egg whites. Lightly mix and fold them in so as not to lose the fluffy consistency.


The mixture will be thin until it sets. You can pour it in the shot glasses, or let it set and pipe it in. I choose to pipe it in later, usually with a sandwich bag with the corner cut off after the set mousse has been put in. If you don't want to do shooters, separate it into dessert bowls and let set.


Tips:
I usually use the coffee in my mousse as it is a great blend. These ideas are great, however they are so easy to modify based on the bakers own vision. These are just starters to get the mind working to imagine different versions.


These are my gorgeous prom shoes. I love thin stilettos, I find them very flattering especially because I am tall and have long legs. And find my sun tanning lizard and you have great eyes.


So now that I am tired and sore from playing with my nephew, it is time for bed. Oh and I mentioned last night, I have been seeing the Venus and Jupiter outside my window the last few nights. I got a picture!


Jupiter is on top, They are just gorgeous to see.


As Julia would say "Bon Appetit!"

Happy Baking!

Sey