Sunday, 8 April 2012

Day 30 - Free for All

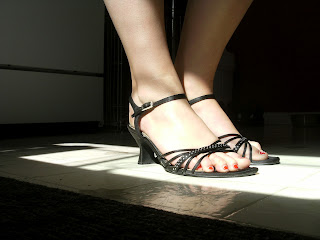
Easter. A day (or weekend depending on your family) of chocolate, family and lots of food. The family was over and we had a great time. The meal was amazing, the dessert was a hit and the dog is passed out from all the excitement. Got rid of a bunch of the goodies that were piling up in my freezer, and I ate so much that I think I put back on all the weight I lost. Max chewed up a few of baby's toys, and got a good play session with my sister. He is doing great with laying under the table during dinner, it is still mainly the nipping that is the issue. Oh! In honour of the end of my 30 day challenge I bought a new pair of shoes, they are my picture below. I love them!! I can't wait to wear them on the town.

So dessert for the family was left for me to come up with, and it so happened to fall on my 30th day. I went through recipe after recipe trying to find the best dessert for the occasion. After my eyes had crossed and my head hurt, I went shopping for a few ingredients for a few of my other challenges, and I spotted it. It cost $20 and had a great picture on the front of my dessert. I didn't buy the set, as I knew I had everything at home, but I bought everything else I needed. My great idea isn't baking exactly, but it is a free for all so it doesn't matter. Are you ready, my idea was....Build your own sundae bar!!! It works so well, buy anything you want for people to put on top of ice cream and let them go at it. You will be amazed of the sundaes you see come away from the bar. As there is no real ingredients I have listed ideas of what you can have below.


Build Your Own Sundae

Ice Cream
Waffle Bowls
Bananas
Whip Cream
Chocolate Syrup
Caramel Sauce
Strawberry Sauce
Marshmallows
Sprinkles
Crushed Pineapple
Cherries
Nuts
Candy
Chocolate chips
Cookie pieces
Brownies
Toffee pieces


Anything you can thinks of for people to put on a sundae, you can get it.  Have bowls and spoons set out, and you let people go up and build their dream sundaes. I put everything in the middle of the table tonight, as everyone was sitting at it. However, if you have a more comfortable atmosphere or a lot more people it may be easier to set it up as a buffet.


A great layout for dessert.


Do up a couple little bowls of each topping so that a few people can build at once.


Have fresh fruit out for toppings as well.


Some Sundaes will be simple yet pretty.


Some will be Plain Jane.


Some will be baby worthy.


Others will be mountain high with everything available.


And a few will even be picture perfect.


Tips:
If you are going to do a lot of different toppings, don't buy a lot of each. The main problem with this dessert, is over buying. I do it every time, thinking I need more than I really do. However, with all the baking I do , I can use it all in a couple days.


And here they are!!!


\/

\/

\/

My new babies!!

\/

\/

\/

Aren't they amazing!! I am so in love <3. I am sure Mr. VIP is happy I finally got them, because I have been talking his ear off for the past couple weeks about them. These are my gift for finishing what I started. They cost a pretty penny, but I wanted them the moment I laid eyes on them, and they are perfect to end with.


So that is it, I can't believe it is over. There were some moments when it flew by, and others where it felt like I had a million days left. This challenge has really opened my eyes about baking. It has helped me realise just how work it is, yet how much I love it. It has helped me find new recipes that I probably wouldn't have tried before, and has helped me find a reason to make ones that I haven't done in months. I do plan on keeping this blog going, like I said I will be doing any requests I get, I already have a few lined up. It probably won't be every day, now with all the cakes I am doing, but I will not be forgetting this blog. My new goal is to get to 1000 hits, I'm not far off.

I really want to thank everyone who helped me and encouraged me. A huge thanks to my biggest fan Mr. VIP, from what I can tell he enjoyed his morning lecture, and any little treats he got out of it. He always wanted to know what was on the menu for the day, and get a picture of it before everyone else. A big thanks to my inspiration DJ, I never would have done this without you. And thank you to everyone who stopped by to take a look around and increase my hit counter. Feel free to leave a suggestion or comment and I will be sure to get back to you :).


Happy Baking!!!

Sey

Day 29 - Breakfast

So I woke up to a dog trying to crawl underneath me. Well it was nice sleeping in while it lasted. I have become the chocolatetier of the house. I was asked to make more chocolate covered cherries for Easter and a hockey party we were doing. We got lots of food together to watch a few hockey games, and my my was there ever a lot of food. My nephew and puppy got together and just had a great time together. Alexander loves Max and can not get over the amount of fur her has.


The first thing I did when I got up this morning was make blueberry scones. I thought this would be a great breakfast recipe. Now scones are very difficult to make, some people can make them and some can not. So if you don't get it right the first time, try again and again until you get it. They will eventually turn in to the fluffy, light scones they were meant to be. Scones can be made sweet, savoury, or a simple plain. They can be eaten with any meal, with all different toppings. My favourite are cranberry scones with homemade jam and clotted cream for breakfast, no better way to start your day.


Blueberry ginger scones

Oven 430F

2½ cups self-rising flour
1 tablespoon icing sugar
2 tablespoons butter
3 teaspoons ground ginger
½ cup fresh or frozen blueberries
¾ cup milk
½ cup water

Grease deep 9x9 inch square cake pan.
 
Sift flour and sugar into large bowl; rub in butter with finger tips. Stir in ginger and blue berries. Make well in centre of flour mixture; add combined milk and almost all the water. Using a knife, “cut” the milk and water through the flour mixture to mix a soft, sticky dough.  Dough should be tacky, yet still keep its shape.

Knead dough on a flour surface until smooth. Press dough out to a 2cm thickness. Dip a 4.5cm cutter into flour; cut as many rounds as you can from the piece of dough. Place scones side by side, just touching, in pan. Gently knead scraps of dough together; repeat pressing and cutting of dough. Place in same pan. Brush tops with milk.

Bake scones about 15 minutes or until browned and scones should hollow when tapped firmly on the top with fingers.


Grease your square cake pan.


Sift together flour and sugar.


Use your fingers to rub in the butter.


Mix in blueberries and ginger.


Make well in the centre of dry mixture.


Cut in milk and water with a knife. This means to slowly drag the knife through the mixtures so that they slowly combine.


Knead dough into a ball and press in to a 2cm thickness.


Cut out as many rounds as possible and line them up in the pan.


Brush the top of the rounds with milk.


When cooked, you will have fluffy warms scones for breakfast.


Tips:
The dough should be sticky, so flour your hands and lightly knead the dough. Don't over knead.


I love the side buttons on these, it adds an originality to them.


I can't believe I have one more day. I also can't believe I am actually finishing in 30 days with over 600 hits :). Well I have a baby shower cake order to start designing for I hope everyone enjoys their Easter dinners. Happy Easter to everyone.


Happy baking!

Sey

Day 28 - Cheese

Got the cake done!! It looked awesome if I do say so myself. Everything was edible, I did advise not to eat the cards thought because of the black food colouring. The poker chips are coloured chocolate with fondant stripes, the cards are fondant with hand drawn symbols, and the little suits around the base are chocolate. The birthday boy likes chocolate, so it is a chocolate on chocolate cake with a buttercream icing.


I am really proud of this cake. I need to work on smoothing my icing but other than that I am really getting the hang of this.

So of course when people think cheese they think cheese cake. I am not a huge fan of cheesecake, because I find it heavy and sweet. Than 2 years ago I came across a recipe that was for a Ricotta Cheesecake with a strawberry and balsamic topping. This is a recipe that everyone loves, even if they don't like the usual cheesecake. It is super light and creamy, there is no sugar sweetness to it and the strawberries topping is amazing. I know that the balsamic vinegar will have peoples nose go up, but strawberries and balsamic vinegar were meant for each other. Get a bowl of strawberries, drizzle on the balsamic and a little pepper and you will be amazed at the flavour. It all changes when they combine. I have no interest in balsamic vinegar at all, but with this recipe it is perfect. Another great part of this recipe is the brown butter used in the crust, it brings a whole new flavour into the mix.


Ricotta Cheesecake with Strawberries and Balsamic

Oven: 300F

Crumb Base:
2 cups graham cracker crumbs
¾ cup unsalted butter

Cheesecake:
2 cups ricotta cheese
2 teaspoon grated lemon rind
½ cup granulated sugar
2½ tablespoon all-purpose flour
3 large eggs
1 teaspoon vanilla extract
Pinch salt
 
Strawberries:
2 pints strawberries, cleaned, hauled and sliced
1½ teaspoon lemon juice
1 tablespoon granulated sugar
½ cup balsamic vinegar
¼ teaspoon freshly ground pepper

Melt butter in a saucepan over medium-low heat for 12 minutes, swirling pan occasionally, or until butter stops foaming and starts to turn brown around the edges of the pan. It  will start to smell nutty. Remove from heat and mix in graham crumbs. Stir until fully combined. Let cool slightly and press mixture into a 9-inch springform pan making sure it goes to the top. Chill.

Beat together the ricotta and lemon rind in a stand mixer with the paddle attachment for about 2 minutes on medium speed or until smooth and well combined. Turn mixer speed to low, add sugar and flour and mix until well combined. Add eggs 1 at a time, making sure each egg is fully incorporated before each addition, then ass vanilla and salt. Pour mixture into prepared, unbaked crumb crust and bake cheesecake for 50 to 55 minutes or until set in the middle. Let cool at room temperature and than chill in the fridge until cold and set.

Toss strawberries with lemon juice and sugar and set aside.

Place vinegar and black pepper in a small pot over medium-high heat and bring to a boil. Reduce heat to medium and simmer for 4 minutes or until syrupy – watch it does not overcook. Strain berries of any liquid and pour hot syrup overtop berries, stirring to coat.

Cut cheesecake into slices, place on a plate and spoon berries and syrup overtop.


Melt butter in saucepan.


Butter will foam before it browns.


When foam disappears the butter is ready, watch because butter can go from clear to brown, to burnt very fast. It will smell wonderfully nutty when it is turning brown.


Mix in the graham crumbs, until well combined.


If you have a tall springform like mine, go up the side about an inch with the crust.


Whisk the lemon rind and ricotta until smooth.


Blend in flour and sugar.


Beat in one egg at a time until well combined and smooth.


Pour cheese mixture into the crumb crust.


Mix cut up berries with lemon juice and sugar.


Combine the pepper and vinegar in a saucepan.


Simmer until it becomes a syrup. After 4 minutes it may not look like syrup, but when it does cool it will become thick like one.


Pour hot syrup over berries.


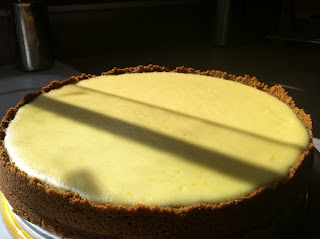
The baked cheesecake will be a yellowish colour when fully cooked.


Put a slice of cheesecake on a plate and spoon the strawberry mixture on top.


Tips:
I prefer to slice the strawberries and than take a potato masher to them, This mashes them up so they are a little softer on the cheesecake. If all the strawberries are not used on the cheesecake, they can also be poured on top of vanilla ice cream.


Now I am not a huge fan of suede shoes, however these ones are cute. They have a little leather ribbon around the edge with a bow that make them adorable.


This cheesecake lasts about 24 hours in my house. It is a perfect dessert for everyday or special occasions. I am so happy to have some in my house to eat :D.


Happy Baking!

Sey


Day 27 - Egg based

I finally got all my cleaning done. I was up early to take Max for a long walk and to play to tire him out and than I got right to work cleaning the house. I got the drapes washed, dusting done, floors washed, everything! I had all the windows open to get the fresh air going through the house and Max just slept in the front hall while I ran around the house. After finishing the chores, I started on another cake order. It was for a Birthday Poker Cake. I will post a picture when it is all done. Now that I am familiar with chocolate molds, I am going to try and use that to my advantage. Maybe use them to make poker chips or the cards.  As you can see below the puppy was completely tired out after the walk.


When I think egg based, I think meringues. They are a super light cookie that can be eaten on their own, or added to ice creams and sundaes. It is a recipe that takes a longer amount of time to cook, but the actual recipe is pretty simple. When baked the meringue turns into a crispy styrofoam type cookie that literally melts in your mouth. You can make them in to cookies, or large disks to layer with berries, ice cream or whip creams.


Crisp Chewy Meringues

4 egg whites
pinch salt
1 teaspoon vanilla (or orange flower water, or maple extract)
1/8 teaspoon cream of tartar
2/3 cup sugar
2/3 cup icing sugar
1 tablespoon cornstarch

Whip the whites and salt into peaks, add the vanilla, and continue beating to stiff peaks. Stir the cream of tartar into the regular sugar and whisk into the whites very gradually, a spoonful at a time, until the meringue is stiff and the sugar has dissolved. Sift together the icing sugar and cornstarch. Sift over the meringue and gently fold until fully incorporated.

Pipe or spoon the meringues onto a parchment-lined baking sheet. Bake at 225ºF/110ºC until cream-coloured and crisp on top when tapped, 1 to 1-1/2 hours. Remove from the oven. Cool on the trays. Store in an air-tight container.


Beat salt, whites and vanilla until stiff.


It should be thick and fluffy when its is ready.


Whisk in the regular sugar mixture a spoonful at a time until sugar is dissolved.


Lightly stir in the icing sugar mixture until combined.


Drop spoonfuls of the meringue or pipe it on to parchment lined baking sheets.


They will be a little soft when they come out of the oven, but will become hard as they cool and will be ready to serve.


Tips:
With all the recipes I do, I come across ones that require only the yolks or whites of the egg. Instead of throwing out the un-needed part of the egg, I have started freezing them. It works great, get air tight containers and just store them in the freezer until needed. I also have a food scale which makes it super simple to use them in a recipes. An egg white ways about 30 grams and an egg yolk weighs about 20 grams.


These are my go to heals when I know I am going out dressed up and will have to walk from place to place (like going to dinner downtown and than walking the market). They are super comfortable and have a little sparkle to them.


Off to finish the birthday cake, hope it goes well.


Happy Baking!

Sey


Wednesday, 4 April 2012

Day 26 - Chocolates

I am locking my door tomorrow and wearing ear plugs, because I am sleeping in even if it kills me. I was so close to sleeping late, even the guys on the roof weren't bothering me, than I got a phone call and it all went out the window. So after a few hours of running around, I was able to come home and make my chocolates and relax with my puppy. He is doing so good, he is getting comfortable and moving around the house without anyone. I'm going to need to start leaving him home alone to get him used to it. I don't know if that is going to be harder on him or harder on me. I have to start designing another cake for a birthday, I hope this one goes easier and better than Mickey.

Home made chocolates can be tricky. If they aren't done right the chocolate can taste waxy and be unpleasant. I use the chocolate wafers from Bulk Barn, also known as candy melts. They work great, taste like real chocolate and the chocolate molds are some simple. So I did 3 types of chocolate for this challenges. A solid chocolate, peanut butter cups, and fruit filled. They turned out great and I plan on experimenting more with the flavours and molds. Now you can microwave the chocolate to melt it, but I prefer to use a double broiler. This gives a smoother chocolate, and you can keep it warm until you need it.


Chocolates

Place chocolate in a double broiler to melt until smooth. If you don't have a double broiler, fill a small pot with water and place a smaller pot or a bowl on top, it shouldn't touch the water. Do not let the steam or any water come in contact with the chocolate. Heat until smooth, turn to low heat when waiting for molds to set.


Solid Chocolate

Pour chocolate in to molds and let sit in fridge for 10 to 15 minutes. Flip molds on to a flat surface and lightly tap the mold. The chocolates should easily falls out, if they do not they are not ready. Let chill a little longer. Finished chocolates should be kept in the fridge or freezer.


Peanut Butter Filling

1 1/2 tablespoons butter, softened
1/2 cup chunky style peanut butter, room temperature
3/4 cup confectioners' sugar, sifted

Makes:
Approximately 30 candy centres.

Cut butter in small pieces and put in small saucepan over low heat. Add peanut butter and stir until melted. Remove from heat. Stir in confectioners' sugar, blending well. Add more confectioners' sugar, as necessary, to form a pliable mass. Wrap in plastic and refrigerate for about an hour. Use filling as a candy centre for dipping, or as a centre between two layers of coating.

Coat the sides and bottom of the molds with chocolate. Put in refrigerator for 3-4 minutes. Form filling in to small disks and press in to molds, without going above the edge. Pour chocolate over the filling and let set in fridge for 10 to 15 minutes. Flip molds on to a flat surface and lightly tap the mold. The chocolates should easily falls out, if they do not they are not ready. Let chill a little longer. Finished chocolates should be kept in the fridge or freezer.


Fruit Filled

Coat the sides and bottom of the molds. Put in refrigerator for 3-4 minutes. Wash and dry choice fruit. Chop it in to small pieces. Place enough fruit to fill molds, without going above the edge. Pour chocolate over fruit and let set in fridge for 10 to 15 minutes. Flip molds on to a flat surface and lightly tap the mold. The chocolates should easily falls out, if they do not they are not ready. Let chill a little longer. Finished chocolates should be kept in the fridge or freezer.


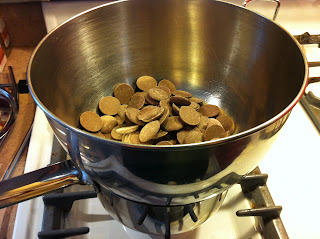
Place chocolate in to a double broiler.


It can be bought in any colour or flavour.


Heat until melted and smooth.


For solid chocolate, fill molds to the top. Tap lightly to flatten tops.


Place in fridge for 10 to 15 minutes. Flip on to flat surface.


Tap gently, if they do not release easily, place back in fridge for another few minutes.


You will now have smooth chocolates.


Peanut Butter Filling


Melt peanut butter and butter together.


Mixture should be smooth, unless using chunky peanut butter.


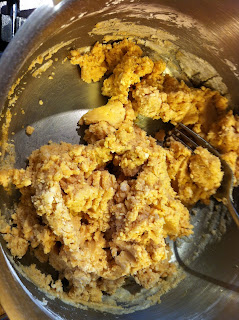
After adding sugar, mixture will look like cookie dough.


Place mixture in plastic wrap and chill for 1 hour.


One way to do a chocolate shell is to fill a mold one at a time, only file half full, roll the mold around to coat the bottom and sides. Than flip the mold over the double broiler and let the excess chocolate run out.


They will end up looking like this.


Another option is filling the mold a third to half way and using a small paint brush to brush it up the sides.


This is my preferred method, as the shell is not super thick at the bottom when this is done.


I used maraschino cherries for some chocolates. I also used chopped up strawberries for others.


Drop a cherry in each mold.


Make sure any filling does not go over the top of the mold. I has to squish the cherries a bit to make sure they did not go over the top.


When covered and chilled, you will have a wonderful plate of homemade chocolates for everyone to try. Or you can keep them all to yourself.


Tips:
Start simple, making chocolates are a lot easier than you think. Start easy and work your way up, and soon you will be making complicated chocolates with no problem.


I enjoyed this challenge so much. The chocolates turn out great, I can not wait to try more fillings. I will post any amazing recipes I come across, so everyone can try it. Do not forget to send me any requests, or recipe ideas for me to try. I have already gotten a few to try out. Also do not hesitate to leave any comments you may have about the blog, good, bad, in between. I take them all.


Happy Baking!

Sey